
Without a good idea of what to get my in-laws for Christmas, and a plot to buy some big slabs of wood anyway, I committed to building a bench for them. I’ve written a separate post on buying the wood so won’t cover that again here.
Design#
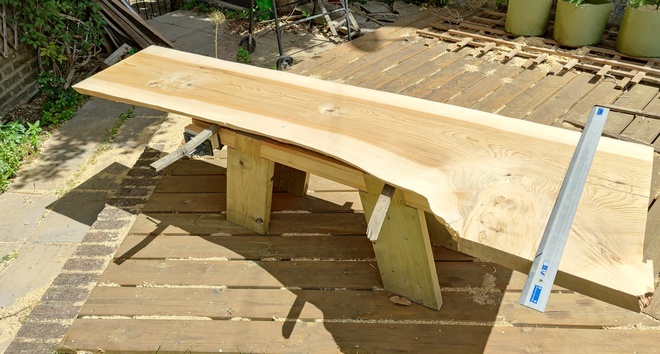
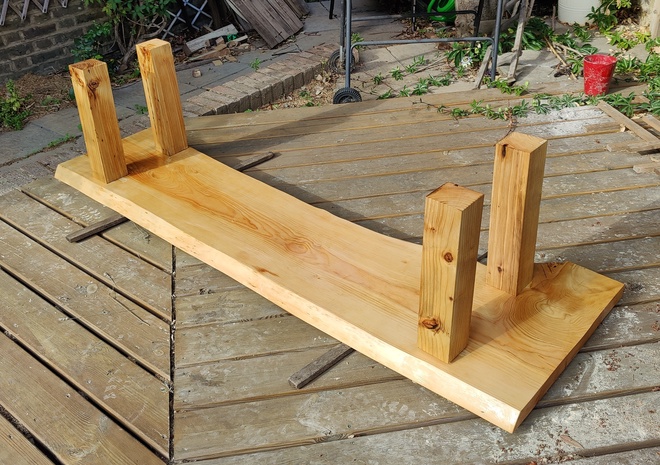
The design was simple (and intentionally so). I wanted it to look rustic (because I’m not a skilled woodworker, it was going to look that way anyway so why resist) and to show off the main wood slab. I wanted interesting legs, but ones that fit with the rustic theme, so opted for some old reclaimed fence posts which I got from peckham reclamation .
The plan was to effectively mortise the legs up into the main slab, and then plane the surface smooth on top. So you could see the end grain of the legs in the surface but the finish was still smooth, and the construction would be sturdy.
Preparing the slab#
First I planed the surfaces smooth. This was time consuming but not complicated. The cedar was very easy to work with, and except around the knot, planed beautifully. I was tempted to trim the slab before smoothing, but I wanted a really good look at what was waiting for me under the rough sawmill finish, and didn’t want to trim until then.
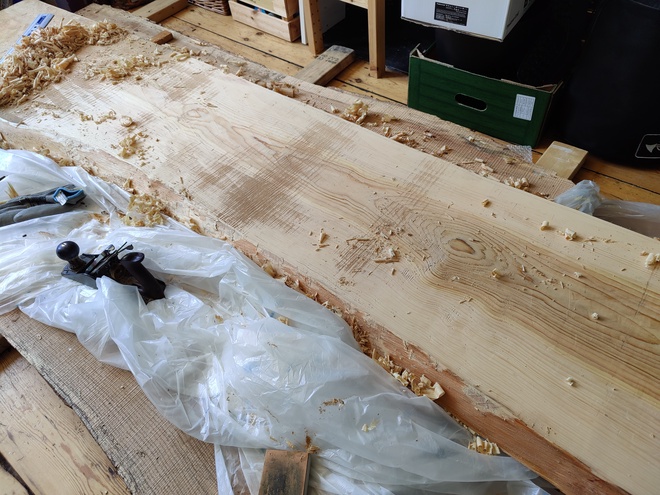
Once I could see the detail under the surface, I confirmed there was a pretty big knot on one end of the slab which was interesting but also, very not flat. I also know that the slab was around 20-30cm too long for the intended location for the bench, which meant I had to choose which end to trim. The knot end was an obvious choice, and also starting to crack already.
Resin filling the voids#
After also planing back the rough surface from the reclaimed legs, I could see I had a lot of voids to fill. Using deep pour clear epoxy, I filled both the obvious knots and cracks in the surface, but also the deeper voids in the cut leg sections. In the surface, I didn’t want to make the resin filling obvious, and therefore opted against any form of pigment or colouring. For the legs, it was going to be pretty obvious that they’d been epoxy filled (because of the clear age and damage to some of the wood), but I still wanted a more natural farmhouse vibe than a super modern, coloured epoxy finish.
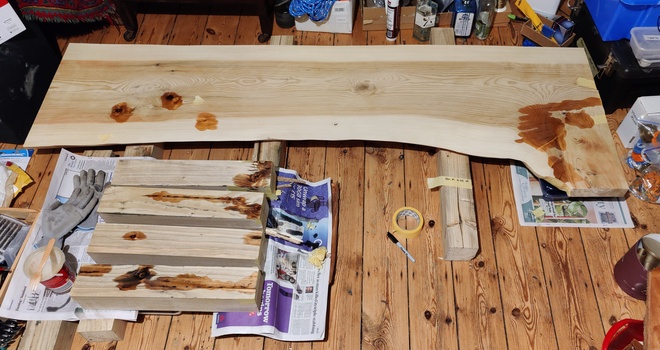
What I did find, somewhat with the knots in the slab, but definitely with the reclaimed legs was that the wood really drank the epoxy. I found myself pouring more and more into them as each batch was soaked up. In retrospect, I should have first painted the voids with epoxy to seal the surfaces, and only after that done the deep pour, but … now I know that 🤦.
In almost all of the cases, I managed to eventually fill the gaps deep enough, and also avoid any major air bubbles. After building up enough of a surface, especially on the legs, I then re-sanded back to dimension and re-filled any small remaining voids or air bubbles.
Cutting the leg holes#
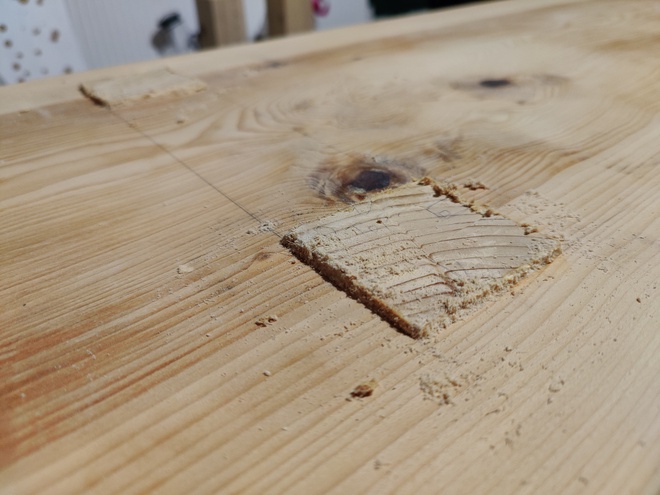
Cutting the square tenons on the legs was easy with a saw, but cutting the mortise holes in the slab was more stressful. Not least because I knew that the top surface would be the working (and visible) surface of the bench, where any defects would be very obvious. Working from the top side down, I first drilled pilot holes at each of the corners, and then used an electric jigsaw to join them up, removing the bulk of the material. The rest was removed by hand with a chisel, measuring frequently to make sure that the holes were perpendicular to the bench surface. I did accidentally get some minor tear-out on the underside of the bench by being too enthusiastic when chiselling from the top surface, but nothing very visible.
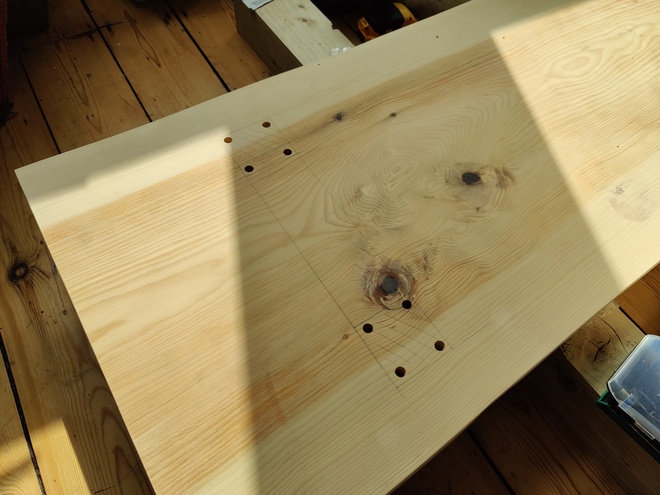
I cut the mortises slightly long on purpose to make sure I had something that would sand back to being flush with the surface, and when inserting the legs, added sawdust into the wood glue around the joint to mask the gaps. The leg mortises were very tight by design and needed some real hammering to get them in, but the end result was excellent.
Finishing#
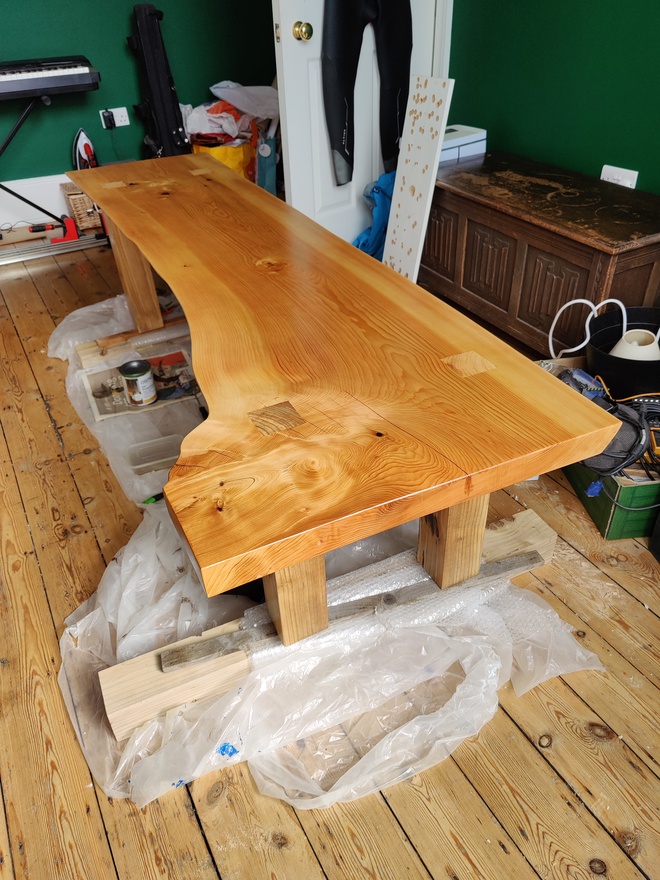
Once everything was fitted, I sanded everything back to around 200 grit, and then used some Osmo UV Protection oil because I knew this was going to get a fair bit of sun. The UV protection oil added a slight yellowish tinge to the overall effect, but one that actually came out quite nice, in particular evening out the shades of the cedar and the pine legs.
On the bench surface, I gave the slab several coats of oil, each applied very thinly, and with a little sanding back in between. This gave a lovely sheen finish, while on the legs I left the surface slightly rougher to have a more matt effect.
Summary#
I started this project in parallel with the desk, but very quickly realised that I didn’t have enough space to do both at the same time. Especially when working on the slabs, the amount of space required to do things like resin pours or large flattening is quite significant.
After realising this, I focussed much more on just getting the bench finished first (effectively putting the desk on pause), and then made much faster progress on the bench. Overall I think I went for a design which was well matched to my skill level (a simple design for a fairly unskilled person!), and learnt a ton of things along the way which I could then transfer over to my more complicated plans for the desk.
Very pleased with this project, and I know the recipients are too. 💯
