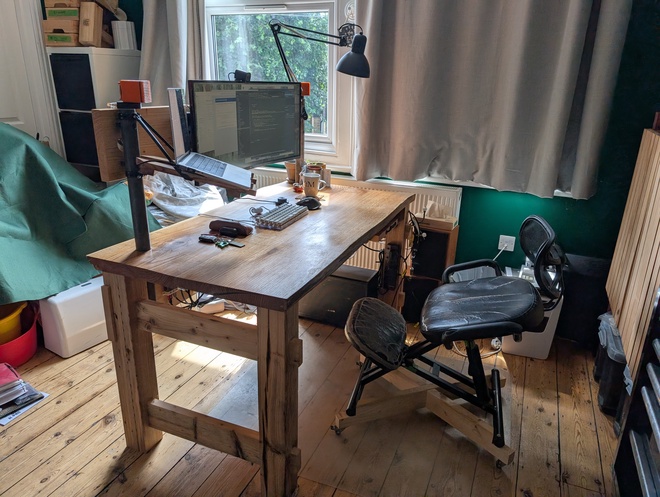
After building the oak desk and using it for a few months, I had two growing frustrations:
- Cable chaos - With a laptop, multiple monitors, desk lamp, and various chargers, the cable situation was getting out of hand. Everything was either draped across the desk or dangling down behind it.
- Desk real estate - My laptop stand was taking up valuable desk space. I wanted to use it as a second screen but also free up the surface for actual work.
The solution? Build a backplane system using scaffold poles that would let me mount things above and behind the desk surface, whilst also providing a clean way to route cables.
Scaffold poles and backplane#
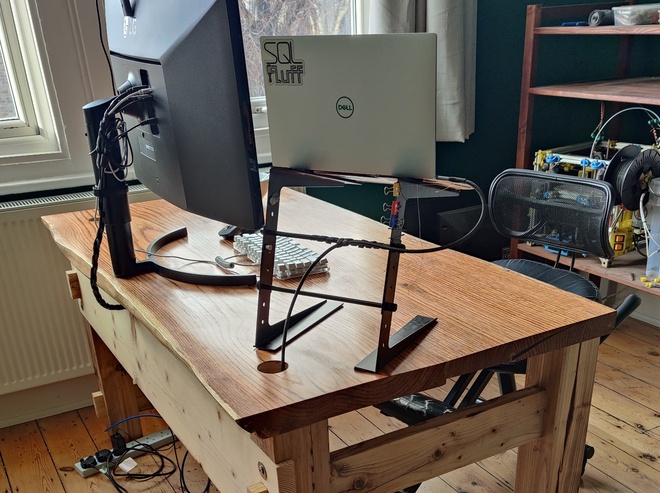
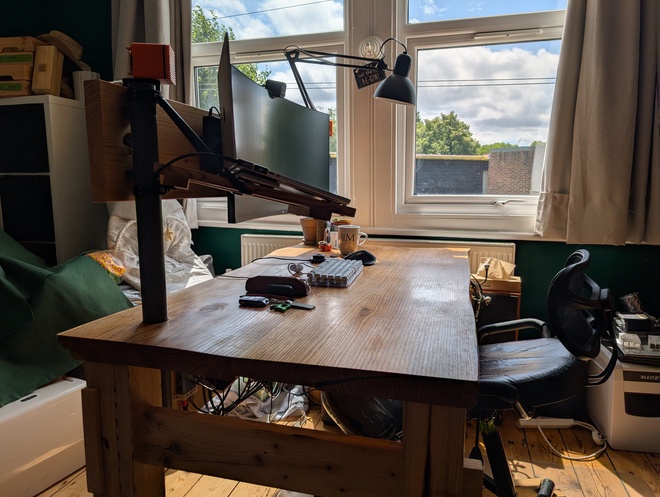
I’d deliberately drilled two large holes through the back corners of the desk during the original build, anticipating this eventual upgrade. The plan was to run vertical scaffold poles through these holes and then attach a horizontal wooden backplane across the back.
The scaffold poles are standard 48mm diameter and are held in place with floor flanges underneath the desk. They’re rock solid once tightened up, and the industrial look actually works quite well with the rustic reclaimed wood aesthetic of the desk.
For the horizontal backplane, I used a length of the scaffolding plank that I’d used for the desk stabiliser. This keeps the aesthetic consistent and also means it’s chunky enough to securely mount things to. The challenge was attaching it to the round scaffold poles in a way that was both sturdy and adjustable.
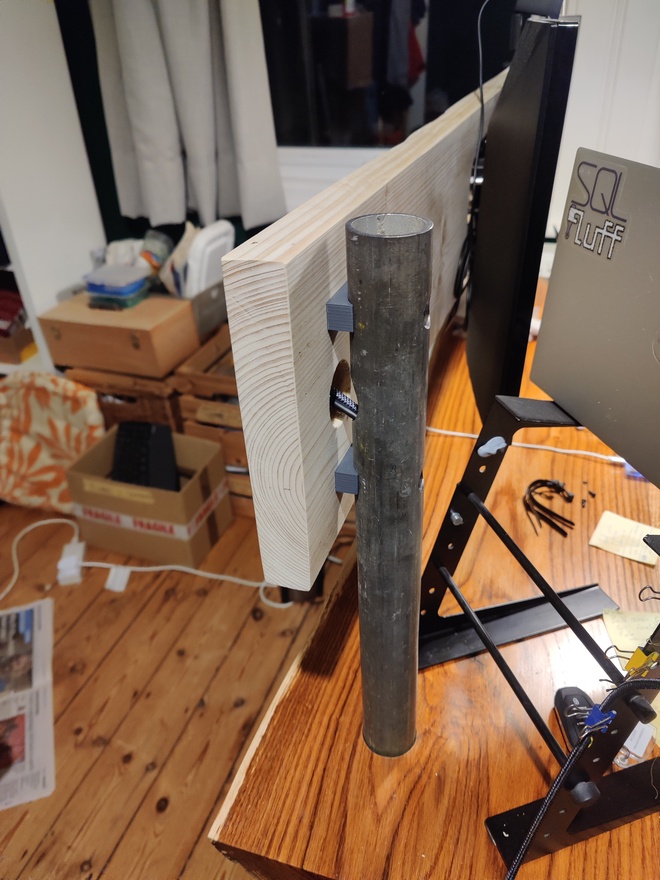
This is where 3D printing became invaluable. I designed and printed custom spacers that clamp around the scaffold poles and provide a flat mounting surface for the wooden backplane. They’re printed in PLA and there are corresponding ones on the inside of the poles to provide a flat surface for the bolts to clamp to.
At this point I had the backplane working well for cable routing and monitor mounting, but the laptop was still using its old stand on the desk surface. This was the next problem to solve.
3D printed laptop stand#
With the backplane in place, the first accessory was a laptop stand. I wanted the laptop elevated and angled for use as a second screen, but also needed to get power and data to it cleanly.
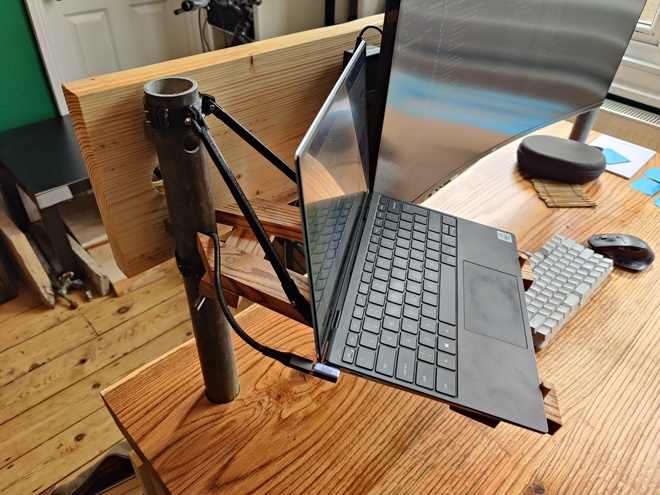
I designed a simple angled stand that bolts directly to the wooden backplane. The clever bit is the cable management - a USB-C cable runs down through one of the scaffold poles, emerges underneath the desk, and connects to a hub. This means the laptop gets power and data without any visible cables running up the back.
The base struts are reclaimed bits of trellis, planed and oiled to match the desk aesthetic. The tension members are 3D printed in black PLA, which gives them just enough flex to deform slightly under the laptop’s weight and provide a bit of shock absorption.
Monitor mounting#
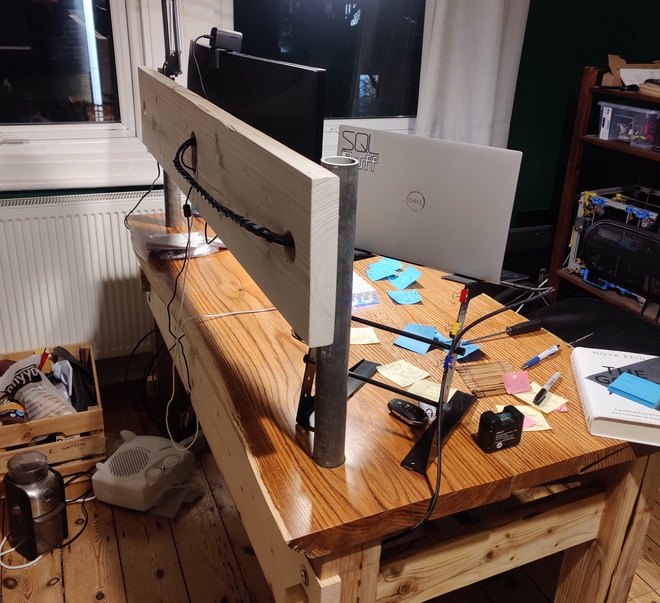
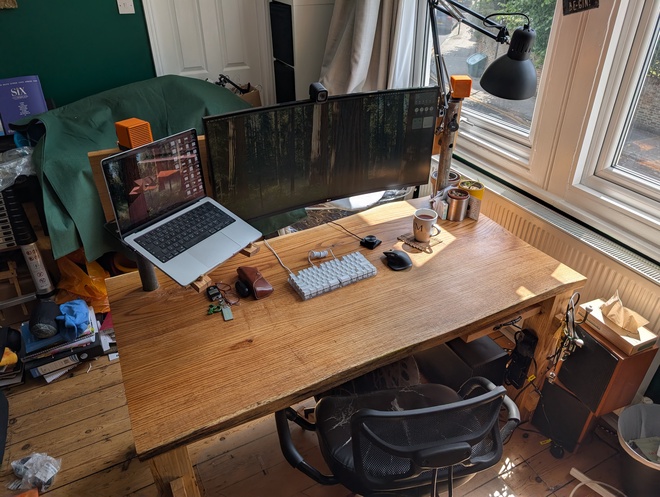
The centre of the backplane was reserved for my main monitor. Rather than using the monitor’s original stand (which would have taken up desk space), I attached a VESA mount directly to the wooden backplane.
This positions the monitor at exactly the right height and distance, and again, all the cables route along the back of the scaffold plank and then down through the scaffold poles and under the desk. The monitor appears to float above the desk surface, which looks great and means I can use the full depth of the desk for work.
Cable management and final assembly#
The real magic of this setup is underneath. All the cables - power, USB, display, ethernet - run through the scaffold poles or are clipped to the back crosspiece that was already part of the desk structure.
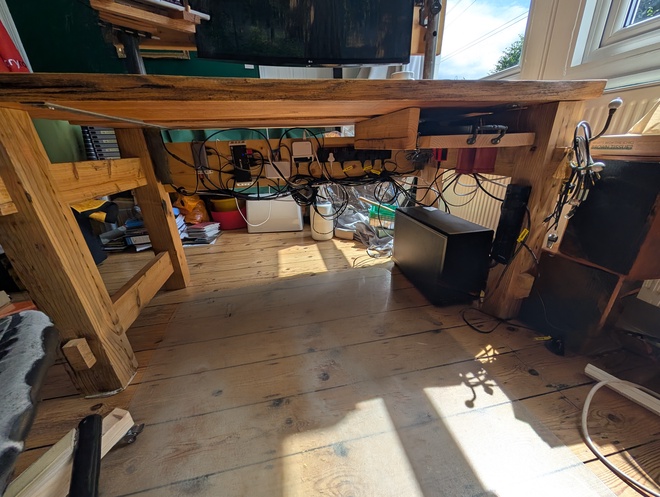
I added some 3D printed zip tie mounts to the underside of the desk and the back crosspiece to keep everything tidy. The power strip is mounted underneath as well, so the only cable that actually goes to the wall is a power lead (and an ethernet cable when I’m not on wifi).
The result is a completely clean desk surface. When I’m working, there are no cables visible at all - everything is routed behind and underneath. I can slide things around on the desk without snagging on cables, and the whole setup just feels much more intentional and professional.
Summary#
This was a much quicker project than building the desk itself, but the impact on daily usability has been huge. The desk surface is now completely clear for actual work, and the cable situation went from “tangled mess” to “completely invisible”.
The combination of scaffold poles and 3D printing worked brilliantly - the poles provide industrial-strength mounting points, and the 3D printed parts let me create exactly the custom fixtures I needed. Being able to iterate on the spacer design a few times until I got the fit just right was particularly valuable.